
| |
Home Videos Books Order Form Engine Overhaul Transmission Overhaul Parts Price List Classifieds Stories Samples Quizzes Ask the Maestro | The Grey Ghost
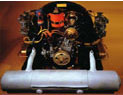
The Maestro is always amazed that there are a few 356 Owners out there who STILL use a 356 as their ONLY car! Or, if they DO have another car- their OTHER car is a 356 too! .....Ergo, they must ALWAYS drive a 356- every day. Not a bad thing to do for a 356! If you want them to last, you gotta DRIVE them! .....Anyhow, this Original Owner put some 390,000 miles on his 1965 356 C Coupe, which he drove every day across the Bay, to The City & County of San Francisco. And back, necessarily. .....His second car was a '57 Speedster, which with its plastic Side Curtains as your only protection, is much less desirable to drive and leave in San Fran- especially on a rainy winter's day! .....Since the Speedster is what he'd be a-drivin' when the Coupe was a-being rebuilt, the Owner understandably wanted the job done as quickly as possible. .....Yes SIR! Said the Maestro. .....A little History: During the 390,000 miles, the engine had been rebuilt three times. This would be Time Number 4- One Past The Charm. .....The last overhaul had lasted 90,000 miles, which isn't bad really, but as Click & Clack of NPR might say "she wouldn't pull a hill no mo'". She all the signs of a burnt valve in #3 cylinder. .....As the guy dropped off the gun-metal gray Coupe, for the half-million mile Powertrain Transformation, the Owner grabbed the Right end of the Front Bumper and wiggled. The Bumper wiggled like it wasn't attached to anything no mo'! ....."Can you fix that too?" he asked. ....."Hey, no problem", said and thought the Maestro. "Just a few bolts. I oughta be able to fix that pretty easily." (Uh, Oh, warned the Porsche gods, tapping their collective feet. He knows he's NEVER supposed to say that! They were about to give him an Education. Or a refresher course at least. Again.) .....The Maestro Assumed the Position under the front bumper, and eyeballed the Bolts holding the bumper bracket to the bumper. .....One "bolt" was actually a square 'Merican nut- stuck with misogyny in mind to a Metric stud! On one turn and stuck tight. Rusted too. The other half of the bumper bracket had the "regular" trapped metric nut in place, but the metric bolt was completely MISSING! .....That meant that the bumper was attached on the right sight by only ONE thread of a mismatched metric/'Merican combination! .....Which meant that the body shop that put the Porsche's bumper on sure didn't do many metric cars! .....The shop didn't have a metric nut, so they forced an American one on- about One Turn of the Screw's worth. .....The body shop also couldn't find a metric BOLT to fit into the trapped nut in the hole, so they didn't put anything there! which is Good- that way they didn't screw up the threads! .....The Maestro calmly reached into his Tray of Cad Plated Treasures and withdrew the proper length 14mm ATF, 8mm Bolt that was the perfect fit for the bumper bracket trapped nut. .....He was able to pop off the obviously wrong square American nut and replace it with a real 14mm ATF Porsche nut. That got the bumper guard back together again without rattling. .....Because of the overly loose "bolts" that the previous Body shop used, the bumper "sat" on the bottom of the rectangular "cut-out" in the car, used for the Bumper Bracket to enter the Nose. Resting on the bottom of the cut out means the bumper has a hacksaw effect on the lower sheet metal of the hole- eventually sawing and dropping and sawing some more- especially if the frontmost bumper support bolts are loose, allowing the bumper to sag. .....In this case, two of the Bumper-to-body bolts were American bolts (again), and very long- going alllll the way through into the battery box area of the car. But what the hell- they worked. .....So, as the Maestro opened the hood to remove the spare tire to remove the nuts on the American Bolts that protruded in to the trunk area, he got a Big Surprise. For there was: .....AN INCH OF WATER in the trunk! .....AND several large PIRANHA made a grab for the Maestro's hand. By reflex, he recoiled Just In time. .....Well, though the Pirana part is stretching it, the water part was true. The inch of water had probably entered during the heavy rains of the previous week. But where in the Front Trunk did the rain leak in from? .....The Maestro inspected the hood seal. It Looked perfect. (It was.) Then he checked the drain holes in the bottom lip of the hood area. They were there and open. .....Humnmmh. .....He checked the battery box for having holes. No holes in the bottom. .....Hummh, he thought. There's gotta be a source. .....And then the Maestro spotted it! The Source of the Leak. .....And What did he spot? .....Wanna guess? .....The Body shop that repaired the car had to replace the headlight bucket area. When they did, they pulled the headlight wires through, and pulled the GROMMET loose that protects the wires in the Vertical Side of the front trunk. .....Now both grommet-less headlight wire holes were open enough that water thrown from the front wheel could enter the trunk. But with no holes in the trunk, the water just STAYED there. And stayed there. And stayed there- rusting the battery box with every passing second. .....The Maestro got to it in time though, and only a general Brown discoloration was present. WD-40 cleaned that up nicely, and some paint will follow. .....Eventually, the Maestro pulled the 356C's engine and began the needed overhaul. And did he get a surprise! Instead of a 356C crank, there was a HKU Germany Repro crank (that's pretty good), a set of rather rough Repro rods with the "W Germany" cast/forged into their sides (that's bad), a Repro cam with one lobe badly worn (that's really bad), a set of ATE cam followers (that's good), with even the ones on the bad cam lobe not too badly worn. (that's good), a decent 200mm flywheel (also good). .....Then he found some oddball stuff- the driven side of both Oil Pump Gears was badly worn- about as badly as the Maestro's ever seen. That's Bad. .....Usually- especially in mechanical Tack oil pumps with the tach drive gear- the bearing on the tach drive gear wears out. The gears get catywhompus to each other and start mutually wearing each other badly. The resulting galling/spalling wear pattern begins at one end of the gear and walks its way down to the other end, getting worse as it goes. .....He's seen some Real Bad Ol Pump Gears, but THIS gear set had REALLY BADLY worn gear teeth. But then, this was not entirely unexpected given its 390,000 miles! .....As the Maestro was disassembling the engine, he also noted how oily it was. Mustave had a Big Bad oil leak somewhere. But the oil leak wasn't from the pulley seal, nor from the head nut or push rod tube seals. .....Nope. This oil leak was from the STANDPIPE that supports the Oil Junction Block where the Temperature and Oil pressure idiot light sender are attached. The standpipe is a steel fitting that screws into a thread hole in the oil passageway of the aluminum case. .....Now, Ifin fin one were to, say, OVERTIGHTEN the Standpipe, such as may have occurred during a Previous Overhaul, one finds that one can STRIP THE THREADS IN THE CASE! And the pieces of threads drop down inside the main OIL PASSAGEWAY! With all kinds of potential destructive possibilities. .....One of the previous overhaulers had Overtorqued things and stripped the threads in the Case and then "fixed" it with a turn and a half of Helicoil. Not such a good idea. The fitting leaked oil out underneath the Junction Block. From there, it was but a hop skip and a jump to the side of the case, to the Pulley for distribution of oil all over everything. .....The Maestro torqued the case together and got his Dial Bore Gauge out of its Constant Temperature Bath/Hot Tub. (This IS California.) And measured the Case. Hmmh, still standard, but about three thou out at the Flywheel Main,. .....Hummh. The Middle Main was more than two thou out. As was the #1 main. .....Looks like after almost Four Hundred Thousand Miles the Case will FINALLY have to be Align Bored. See, these thing DO last a loooonnnggg time if you take care of them and DRIVE 'EM! .....Oh, and the Real Reason the engine required a rebuild? The Problem? Yes, it was a burnt Valve in #3 Cylinder- probably from using a regular 356C, ATE 3045 a non-Sodium filled exhaust valve. The Maestro likes Sodium, having played with millions of pounds of it when he worked in the Nuclear Industry on the Breeder Reactor. Thus, he ALWAYS uses the SC/912 Sodium-filled exhaust valves. They're a bit more expensive, but they don't "burn" nearly as easily. .....THe engine also had an NPR Big Bore Kit piston set lurking inside, with #3 cylinder having a broken top ring that was verrrrrrryyyy close to "chunking" the top of the piston! Still not bad for 90,000 miles. .....The guy was actually LUCKY that the exhaust valve burned first - less damage was done to the head than if the piston had chunked! .....The oil leak played a role in all this, as the cooler was half blocked with crud on the outside, and the cylinder and head fins badly gunked up too. The engine mustave run pretty HOT! .....But hey, 90,000 miles outa your THIRD engine overhaul ain't too bad. Though the Maestro likes to have 6-digit longevity before the rebuild can really be used with "successful" in the same sentence. .....In any event, with a rather nice "C" cam from an Industrial Engine, a "hemi" cut on the "C" heads, all new valves and guides and one of the last new Big Bore Kits in the Universe- shimmed to produce 8.8:1 compression- this engine will "pull hills" once again. .....That's 'cause the owner: Kept the 356 Faith! P.S. Removing, rebuilding and reinstalling BOTH the Engine and transmission, along with the Disk Brakes was a LOT of work. It took the Maestro most of Friday, Saturday, Sunday and Monday, just to re-install everything. .....The guy wanted to pick up the car on Tuesday, and by George, on Tuesday morning, the Maestro was conducting the first full dress test drive of the rebuilt Powertrain. .....With some trepidation, the Maestro fired up the New Engine. It fired up and ran just fine- no real surprise since the Maestro had previously fired it up on his test stand, adjusted the carbs and timing and ran it for an hour. The Maestro doesn't like surprises AFTER the engine is installed. .....The gearshifter attached to the new Transmission appeared to find all the gears. With the new Boudon tube, the clutch was smooth as silk. The Maestro eased the shifter into Reverse and backed the car out of the garage. So far so good. He selected First. The car moved forward. .....Down the Airport Test Track the Maestro went, slowly at first, shifting carefully through the gears. They all worked. Good synchro action. Decent power. .....He stopped off at the nearby gas station, filled the tank up with Chevron's finest Supreme, adding, of course, a third of a quart of 2-stroke oil to the gas tank BEFORE he started pumping the gas. And drove off, experiencing Happy Motoring. .....For all of a mile, when the 356 suddenly STOPPED! Just like you turned off the key! .....BLAAAAAAHHHHHHH went the car. Into Shock went the Maestro. And a terrible feeling of Dread cometh over him, for he was deeply saddened. "After all this work, the car just STOPS???!!! Porsche gods I beseech you- How can this be??? .....But it was. Most Certainly. Reality Stopped. Broke down by the Side of the Road. .....The Maestro had no choice but to coast to a silent stop by said Side of the Road. And the Owner's coming to pick up THIS car in an HOUR! Hanging his head, he thought about applying for that McDonald's job that Mrs Maestro always wanted him to get. .....But no, pulling himself together, he opened the door, dragged himself out of the Driver's seat and pulled the rear deck lid latch. Go to back of car, open deck lid. Inspect for some obvious defect. .....Immediately spot the Power Wire to the Coil hanging loosely in the air, a quarter inch away from the coil. After 30 years, the Coil Wire chose THAT time to loosen and pull out of its clamp. Ah, those Porsche gods, always clowning around with the Maestro. .....Reattach wire quickly. Drive car back to shop. Cut off old exposed wire. Strip a quarter inch of insulation to expose new copper wire. Insert Virgin wire into cleaned clamp. Crimp with electrical crimping tool. Reattach to coil. Problem fixed. .....Heave Big Sigh of Relief. And: KEEP 356 FAITH! P.P.S. The Original Transmission on the car had gone 390,000 miles, and the Owner's mechanic had mentioned that he found not one but TWO Bolt Heads resting on the transmission drain plug magnet the last time the oil was changed. .....Needless to say, the Owner was concerned. .....Now, a loose Ring Gear Bolt Head or two roaming the transmission sump at night is bad enough, but it is also a Sign of something much worse! For it is most likely that there are OTHER Ring Gear Bolts that were also loose! .....And ifin the Ring Gear Bolts come off, you can ruin the Ring and Pinion which is $1800 or so if still available! (Yeah, there are others available, cheaper, but check out the Angle of the Spiral on 'em compated to an Original. .....Anyhow the Owner wisely decided to have the Maestro's Transmission Subsidiary, The Wolfman, do a Transmission Overhaul on it too. .....The Wolfman called with the autopsy results. They were Amazing! .....At first it was thought that 2 of the Ring Gear Bolts had broken off (This was Fairly Obvious as there were 2 Bolt Heads in the bottom of the transmission. Both the bolts and their associated retainer had miraculously missed all the Expensive Things inside when they parted company with the Differential Carrier. .....Turns out, the guy was even LUCKIER- 'cause once the retainers were removed it t'was Obvious there weren't just TWO of the Ring gear Bolts that were broken. There were FOUR broken Ring Gear Bolts. .....And several OTHER bolts were hand-tight- (or, if you prefer, hand-loose!) .....Had this had been a 356A or a 356B transmission, the Ring & Pinion would have been "Toast" long ago. Both the 356A's and 356B's have only 6 Bolts holding the Ring Gear to the Differential Carrier. And, in this case, MORE THAN SIX bolts were broken or loose! .....But 356C's have TWELVE Ring Gear Bolts. So though more than 6 Bolts had failed, several hadn't. They fortunately still held the fort and kept the Ring gear on! There was even the very beginnings of "fretting" between the Ring Gear and .....its Carrier from being looser than it should have been. .....If the Owner didn't take action soo, the Ring Gear would have catastrophically failed anywhere from 5 to 500 miles (certainly within 5,000 miles)! This Owner was blessed by the Porsche gods with the Wisdom to overhaul the Transmission EXACTLY when it was needed! .....That's why 356C Transmissions can go 390,000 miles (and maybe if you are REAL lucky, or have treated her Really Right, 500,000 miles) between rebuilds! 356A's and 356B's with only 6 ring gear bolts have a Life Expectancy of 140,000-180,000 miles before the Ring Gear Bolts break and/or or the Differential Carrier cracks. .....This 356C had the hexagonal 12 bolt carrier pieces with the "half-circles" cut out around 6 of the ring gear bolts. And it was almost the LAST 356C built. (OK, So, then when the Hell did the Factory use the completely Circular 12 Bolt Carrier anyway? In the "SC's only? Carreras certainly.) .....It also had an active, operating Murphy's Machine Shop. The "shank" of one of the broken bolt heads unscrewed itself enough to touch the Aluminum Side Cover of the Transmission! Having broken off, the tip of the shank of the broken bolt was an excellent cutting tool, and proceeded to machine concentric circles in the aluminum side cover. .....That by itself is not so bad, but the machining chips cut by Murphy's Machinists were distributed throughout the transmission as myriads of maundering aluminum particles. .....Fortunately, the gears are tough, and all was OK inside. In fact, the Wolfman told the Maestro that the gears were the best he had seen in heap many moons. And whatever the guy was doing to the transmission, maintenance-wise, KEEP DOING IT! Not bad for 390,000 miles. .....This 356 lasted so long because the Owner DID treat her right- driving her most every day like she should be driven- some 20+ miles each way. Freeway and City. Back and Forth on the Freeway. Every day. Nice Combo. .....She responded by going to the Moon and almost back to Earth on her Original Transmission, and broke down at a convenient time, before expensive damage was done. .....One overhaul every 100,000 miles on the engine. One Transmission overhaul every four engine overhauls. Yeah, that's about right for a good 356. .....In the long run, it's nice when they both engine and transmission need a rebuild at the same time. That way both should last problem-free until the Millennium. After that? Le Deluge. After that? Who Knows. KEEP THE 356 FAITH! P.P.S. .....Well, as long as the Maestro had the chance, he thought he'd relay what things wear noticeably in 390,000 miles. .....1. The Flapper Valve for the carb hot air system was cut 2/3 through by the Vertical Tubes which support it. .....2. Likewise, the hole in the Vertical Tube supporting the Flapper Valve was worn to a Large Oval from a much smaller circle was the Vertical Tubes .....3. The Clutch Boudon Tube wore a semi-circular groove in the steel part of the Left Hand Front Transmission Mount (the Donut like one), from 30 years of rubbing against it. .....4. Likewise, the steel covering of the Boudon tube was worn through buy rubbing for 30 years against the Left Front Transmission mount. .....5. The pivoting/rotating sections of the Heater Boxes had worn out or worn big holes through. Should have been replaced, .....6. One J tube had the exhaust pipe wear through the front of it (inside the part that transfers heat the exhaust pipe to the air, to serves to serve hot air to you. This is a common problem- the Maestro's seen it many times before. .....7. The steel part of the Right Rear Transmission Mount had separated from the rubber middle. But that happens all the time too. .....The Transmission did have a Rather Interesting modification- the Guide tube that the T/O bearing slides on is normally held by studs. Sometimes the studs are replaced with bolts, but here the studs were replaced with countersunk screws, that when seated, were flush with the front edge of the Guide Tube. .....Why is this Significant, I hear you cry? Because if this modification is done, a 912 Throw Out Bearing will fit with NO MODIFICATION! .....Which means you can easily use a 912 T/O bearing, which the Maestro knows is CHEAPER and more readily available that a 356C T/O bearing! He also thinks it's a BETTER bearing! Cheaper and Better, a rare and nice combination. .....(Normally even if you replace the studs holding the Guide Tube with 6mm bolts, the 912 T/O bearing STILL requires some "modification- specifically, grinding downb of the supporting area of one of the "dowel pins" that make up the "ears" of the 912 T/O bearing. This grinding down is not too pretty, nor fun, but is normally required.) .....BUT with the countersunk screws in the Guide Tube, enough clearance is gained to all use of the 912 T/O bearing with NO MODIFICATION! .....Good idea. Gets the Maestro's Seal of Approval. P.P.S. .....The Maestro doesn't like working on cars. R&R'ing the Transmission is working on cars. Ergo, the Maestro doesn't like to R&R transmissions. The Bespectacled Beckle, having three kids in college at the same time, likes to R&R Transmissions. .....But this was a 356C with Disk Brakes, and even the Bespectacled Beckle wanted no part of it. " Disk Brakes. Ugh." So the Maestro if he wanted the job (and he wanted the job) had to do the R&R HIMSELF. .....The Removal isn't too bad. But the Emergency Brake cable system on 356C's. Geez! .....The Time & Trauma lies in the Reinstallation. For it is never JUST the Transmission. It's ALWAYS something else too! MANY other things! .....In this case it was the Boudon Tube. The Heater Cables. The bad transmission mounts. The VW starter where a Porsche should be, making for tight clearances between Pan and top of starter. Sometimes NEGATIVE clearances. (How do you tell a VW from a Porsche Starter. Well, you'll note that the Solenoid is always attached closer to one Starter mounting bolt than the other/. In VW-land this angle is greater that the Porsche. Or, if you prefer, the Porsche solenoid is CLOSER to the bolt hole on the starter than is the VW. It really helps to have both the VW and the Porsche starters to compare and visually memorize the viva la difference.) .....Ah, Another item to add to the Case History and Broken Parts Video Tape Comparing Starters to find the Real Porsche Starter among the VW imitations .....But Transmission Installation takes three days, usually. Because you gotta clean everything underneath of all the crud so that it can't get into things important. That takes time. Then you gotta clean, strip and Powder Paint the front metal trans mounts. Likewise Clean Strip & Powder Paint the Big Hoop that supports the trans. Clean (at least) and plate (ideally) all the bolts that hold everything together, keeping track of all the special ones- like the little conical bolt that holds the U-joint to the shifter rod protruding from the front of the the transmission. .....(Oh, and while we're there, let the Maestro pass along to you a Wolfman Trick or two, since he hasn't written his book yet- 1. - When you're removing the Transmission, do NOT remove the pinch bolt that holds the FRONT of the "U-joint to the shifter rod inside the tunnel. Instead, remove the funny square-headed conical bolt that holds the REAR of the U-joint to the linkage protruding from the nose piece of the transmission. Once loose, use the gearshift lever to 2nd of 4th to pull the U-joint off the trans linkage. .....Then, when you're refitting the trans, simply guide the U-joint over the protruding transmission linkage and reinsert the square headed bolt. That way, you don't have to Binary Search on where the gears are! .....2. A better way than just madly tightening down bolts as you attach them is to put the nuts and washers on the Front Trans mounts so they're loose. Get the Trans hoop aligned with the holes in the Body. Start the two Big Bolts at the top of the hoop into the body. LOOSELY. Then, pick up/rotate the trans up and forward so the studs of the Front mounts slip into the slots in the body. Stick 17mm ATF nuts and washers on the front trans mounts hand tight. Don't tighten them down yet. .....Get the Axle tubes lined up with the Trailing Arms. (Sometimes a scissors jack is nice to have to jack up the trailing arm to make mating with the Axle Tube easier. Now don't forget to put the Rubber Shock Bumper on top of the trailing arm. On 356A/B these are held with 2 Bolts, but on a 356C they're held with THREE bolts. And the Bolt Heads that go from the outside on a 356A/B, go from the Inside Out on a 356C. Go Figure. .....Anyhow, you'll find it easier to get one of the axle tube/trailing arm bolts on, maybe without a washer at first. Use it to draw things together enough to get the other two bolts on, hopefully with washers. Then use those other two bolts to draw thing together enough so you can take out the third bolt and put a washer on it. Repeat on the other side, but don't tighten them down yet either! Make sure the axle tube is RIGHT up against the "stop" provided by the alignment bolt in the trailing arm. A Block of wood helps to coax the axle into position. .....Check everything- make sure the Bouden tube goes under the Transmission bell crank and attach it to the guide support midway on the transmission. .....NOW, go back and slowly tighten up all the nuts and bolts. And don't forget the Ground Strap on the Front of the Transmission. CLEAN IT and the area it bolts into first! .....Now, hook up the U-joint by putting the square-head bolt in and the SAFETY WIRE around it. .....And again, go around and re-torque all the Big Bolts- including the two at the top of the Hoop! .....Now, on the New Transmission: it helps to use a LITTLE grease on the Guide Tube. And on the Throw Out bearing's "ears", and the "U" shaped cut outs of the Cross Shaft. And the Cross Shaft bushings would like a little lube too, thank you. .....And the clutch cable would like some. The Starter bushing and Starter shaft also. Don't forget a one-molecule thick layer on the end of the main shaft for good luck. BUT NO MORE THAN THAT! .....Oh, and while you're doing the transmission, you gotta look at the Bell Crank pivot for the carb linkage, as the plastic bushings have usually long since disintegrated into dust, to be replaced by Rust. And much friction. It is amazing how much better the engine feels when the carb linkage is right! .....And then you get to fix the Heater Cables whose ends currently end in rigged-up Cotter Pins attached through spark plug screw-on ends to operate the heater as little as possible. .....All this is part and parcel of doing a "Transmission rebuild". It's a lot of "working on cars". Not building engines which s is what the Maestro REALLY likes to do! .....Sigh. April 15th's such a Bitch. .....KEEP THE 356 FAITH!
© © 2012 The MAESTRO, Maestro's Library |
Home Videos Books Order Form Engine Overhaul Transmission Overhaul Parts Price List Classifieds Stories Samples Quizzes Ask the Maestro |