
| |
Home Videos Books Order Form Engine Overhaul Transmission Overhaul Parts Price List Classifieds Stories Samples Quizzes Ask the Maestro | Note: The following Article or Story is Copyright 2008, by Harry Pellow,
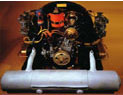
LA-ED AGAIN The Maestro's told you Time and Time again about how the WORST "rebuilt" 356/912 engines he's seen have Come From LA- Los Angeles- the City of Devils. He just got another one in! It was a poor Customer from North California who bought a "rebuilt", "Super-90" from, yes- LA a few years ago. After less than 10,000 miles, only 3000 miles of which the Customer put on, and despite a MaestroMaster .050 Distributor and OEM Plug wires, the engine developed a Knock. A Bad Knock! The Owner dropped the Sump and found Bronze and Aluminum pieces Galore inside and much Hair on the Magnet. This is NOT what you WANT to see in YOUR Porsche Engine. For it was now time for ANOTHER overhaul! 3000 Miles after he bought it! The guy dropped the Southland Super-90 off during one of the BUSIEST Februarys the Maestro's had in Heap Many Moons- all because of, he thinks, 356Talk- the Internet and its World Wide Reach. (Of course, this was during the last of the Boom Times, just before the Great Recession of 2008.) Immediately upon initial eyeballing, the Maestro's optically aided eye spotted Something Suspicious. Yes, of course there was NO Lifting Lug, but on this kind of engine that's a given. No, what the Maestro's eye eyeballed was the Flywheel- the 200mm 356C Flywheel. Which ISN'T a Super-90 Flywheel! Which usually means that the Crank is NOT a Super-90 either, since a "Regular" "C" Flywheel won't work on a Super-90 unless you know what to do. And few Turkeys do. Despite the overhang of engines patiently waiting to be rebuilt, the Maestro found time for this Super-90. After all, besides Industrials, they ARE his Favorite Engine, and he wanted to alleviate its Pain as quickly as possible. On the Outside, the LA Super-90 looked pretty good. It had Powder Painted Sheet Metal which looked nice at first, but the Maestro's eyeball immediately spotted the WRONG hardware in the WRONG places, fairly typical of the Hollywood Genre. The Vertical Surfaces of the Fan Shroud where the sheet metal attaches had 6mm cheese head screws, not the 6 mm Bolts (10mm ATF) that should be there. The Gang from LA even Powder Painted the Crankshaft Pulley! INCLUDING the PULLEY SEAL AREA! Powder Paint is NOT nearly as good a sealing surface for the seal to seal against as is Steel. (Say that fast 5 times.) As was readily apparent upon Pulley removal, for the Pulley Seal had worn through the Powder Paint and Copious Quantities of Oil leaked onto the Pulley, which then slung oil ALL OVER EVERYTHING- including into the Air Stream where it was but a short trip to the Fan for the droplets on their way to the outside of the Oil Cooler/Oil Separator where they collect and act like an oil-bath Air Filter to gather dust and dirt from the incoming cooling air. Eventually the Oil/Dirt Sedimentary Layer plugs enough of the Heat Transfer Surface of the Oil Cooler that the engine overheats badly! That's why the Maestro plates his Pulleys, Polishes the Seal Area and uses the best Pulley Seals he can find- the Viton currently, but the White Silicone Seal was the Best. Sadly, they're No Longer Available. Once the Sheet Metal was off and the Heads Visible, it was clear that this "Super-90" wasn't. This was because:
NEITHER Head was a Super-90! And just HOW could the Maestro tell so quickly that NEITHER Head was a Super-90??? Simple- one Head was the Dreaded 1968 912 Head with the God-awful Air Injectors still protruding turbulently into the Exhaust port! The other Head was a Regular" 1965-1967 912, with the 3/4" hole in the top for the 912's Breather tube. Neither, of course, was a Super-90. Q.E.D. With the Pulley off, the Maestro prepared to take out the little "Key" in the Crank that holds the Pulley so he could take off the Third Piece, split the Case and see what happened to this poor La Brea Beastie. Now normally, in the Thousand Engines or so the Maestro's taken apart, he merely takes a blunt chisel and taps the end of the Pulley key up until it comes out. Or, if the key is tight, taps it up enough to get a pair of pliers on it to pull it out. (On installation, the Maestro selects a Key from his Large Key Collection that fits the best and dresses the key with a file, filing off the burrs and smoothing out and beveling the top edge of the key so the Pulley will slide on easily. This technique works well to fit the "key" on the Crank for the Crank Gears too.) But this time the Key wouldn't budge! The Maestro tapped and tapped. No budgee. He tapped harder. Still no budgee. He tapped HARDER and sliced the end of the key neatly off! Oh, Great! Unless and until you get this Key out, you can't get the Third Piece off- which means you can't split the Case! All because of this damn key. (Now, some of you armchair "Experts" may think you COULD take out the Dowel Pin Bolt of #4 Main Bearing, and Pound the Third Piece of the Case off, figuring that #4 Main Bearing would stay on the Crank. WRONG!!! Late engines have an "Oil Slinger" that goes on inside the Third Piece, against the Bearing and forward of the Key. This Oil Slinger is larger than the Case Bore, so if you were dumb enough to TRY whacking the Case off, you would find afterwards you probably ruined it! Which is why the Maestro didn't go that route. And why he HAD to get the damn Key OUT!) He rotated the Crank to align the Key with the cut-out in the Pulley Seal Housing (the "notch" used to distort and then remove the Pulley Seal). He tried to tap the front end of the Key (nearest the Oil Slinger) "down" so the rear end of the key would come "up". No way, this key had been POUNDED into the Crank by whatever Meathead installed it Down There. So, how do you get "Key" out of a Crank when it's Really, REALLY stuck??? Good Question. I'll give you some time to think about it. The Maestro knew the Solution. He called Jay, the Maestro's Machinist. Described the problem. Jay suggested trying to tap the key sideways to loosen it up in the keyway. No go, the Maestro tried that without success. So, the Maestro loaded the Lower End of the LA engine first into an oil drip pan and then into the Passenger's seat of his Near Virgin in off White 356SC and drove it the two blocks to Jay's. Jay tried his hand at sideways key tapping, but the Key remained stubbornly stuck in its keyway. Would it be forever Mated? No way, Jose. Jay brought out the Heavy Weaponry, Bigger Firepower- the "Hot Wrench". Firing up the Acetylene torch, Jay heated up the key (and a few other nearby parts.) Once sufficiently heated, he took a can of non-flammable circuit board cleaner and directed the cool contents of the can onto the key.
Differential Thermal Contraction can be a Wonderful Thing, for a tap or two then and the Key was FREE! Back went the Maestro to his Shop to complete the Disassembly. And what a Disassembly it was! Those Boys Down South sure can be marvelously innovative for there was a Cam Oil Pump Drive Slot RE-pair the Maestro's never seen before! Normally, a worn Oil Pump Drive Slot in the Cam is weld-repaired, but to fix this one, they drilled a hole in the Cam and wedged in a "roll pin". A "roll pin"? I hear you cry. "WHY did they use a ROLL PIN rather than fixing it Right?" Who knows. The Maestro has no explanation for this. Did it work? Do Bears use Toilets? NO, of course it DIDN'T work! The roll pin cracked in half and exited through the Cam Gear(s)! Showing the signs of much circulating crud, (which used to be Bearings), all the Cam Journals were down three thou (0.003") or more, so the Cam was Trash. When the Case was split, the damage was Obvious. One Rod Bearing had "spun" badly, but EVERY OTHER ROD AND MAIN BEARING was down to the COPPER! DEEP down into the Copper! That's a Real Bad Sign! Even worse, the Crankshaft was a Brazilian Reproduction, which really seems to be in Vogue in LA these days- THREE of the last four LA engines that the Maestro's taken apart had these El Cheapo Brazilian Cranks inside). And when the Maestro hung a micrometer on this Brazilian Beastie, he found EVERY Journal at LEAST 0.002" below Standard, but with #3 Journal- the one with the spun rod- down 0.014". FOURTEEN THOU Under Standard is midway between First and Second Undersize. AND if that fourteen Thou wear is ALL ON ONE SIDE like it usually is, that means the Crank will have to be ground to THIRD Undersize. Running a Third Under Brazilian Crank in a Porsche Engine doesn't give the Maestro a Warm and Fuzzy Feeling. Nor do the Myriads of Marauding Pieces circulating through the unfiltered oil system to all points of the engine- like the Oil Cooler. Like the ones that wore the Cam Journals so badly! Sho' 'nough when the Maestro inspected the Oil Pump Gears the Terrible Torture the gears went through was Obvious and the Evidence of wear overwhelming. But the Maestro learns from these Disasters many Repair Techniques. Many Repair Techniques that DON'T work! So he can avoid them. He also learns how to recognize Bad Parts. Like Cast Iron Brazilian Cranks. Simple way to tell: 1. Look at the Middle Main Bearing Journal of the Crank. 2A. Does the Oil Hole go all the way through the crank, like a tunnel through a Diameter? (Can you see Daylight through the Hole?) or: 2B. Do NEITHER of the two holes in the crank go all the way through. (You can't see through the holes.) Stock Porsche Cranks and the HKU replacement Crank have specially drilled oil holes in the Middle Main that are done for a Reason. NO Porsche crank has the Oil Hole drilled alllll the way through the Middle Main Bearing Journal! Sooooo, if it be (2A.), then it be Brazilian. Avoid them. Sadly, the cost of bringing everything back to "Real" Super-90 Specs was too much for the Customer's Net Worth to bear. After all to make it into a REAL Super-90 it needed a pair of Real Super-90 Heads, a Real Super-90 Crank, a Real Super-90 Flywheel, Super-90 Bearings, Super-90 End Play Shims, etc. So instead, the Customer decided to replace the Brazilian Crank with a 356C (a very good Choice thought the Maestro). Replace the worn-out Cam of course with a MaestroMaster Grind. And replace the Oil Cooler. But reuse the 912 Heads- which, like all LA engines the Maestro's seen needed all new Valves & Guides & Springs. This one having "Two Pair"- two worn-out "Manly" exhaust valves and two worn-out Originals. Until Valve Guide Replacement Time when the Very Large Cracks going wayyyy up BOTH Intake Guide Bosses became apparent. Sigh. Fortunately, that was the God-Awful 1968 912 Head which That left ONE good head, which had been flycut a bunch but still crack-free. But the Rods were usable. As were the Cam Followers (hard to hurt those Ate-numbered Cam Followers). And the Rockers and Pushrods were salvageable. Yeah, it won't be cheap to fix. It never is when: Everything is Something Else. Keep the 356 Faith Maestro The Maestro managed to get the LA "Super-90" back together a few weeks later. With a 356C Crank, reconditioned and balanced 912 Rods, a Maestro Master Cam, Surfaced Ate Cam Followers, the Lower End went together nicely. The Maestro prepared to attach the newly-Lightened 200mm 356C Flywheel that had been lovingly Cleaned, Bead Blasted, Surfaced, LIGHTENED, and Balanced with the used Pressure Plate (the Customer was trying to save a little money.) He hoisted the Sparking Flywheel inside the Engine Stand Yoke and onto the Crankshaft dowel pins. It went on easily, with a "CLUNK". Uh Oh, thought the Maestro. This is TOO easy. Flywheels are a tight fit on and off the crank. They don't slide on and go "CLUNK". He rotated the Flywheel a little and could feel "slop". Sigh. Off came the Flywheel. Over to the tool cabinet went the Maestro, grabbed his 0-1 Micrometer and heads off to the rejected Brazilian Crankshaft. And "miked" the dowel pins of the Brazilian Crank. 0.250". Said the Micrometer. "DAMN," said the Maestro. Who would have ever thought that these IDIOTS would put OVERSIZE DOWEL PINS into a Brazilian Crank???? Yes, it's true the Maestro didn't check the dowel pins of the Brazilian Crank Beforehand! And he certainly didn't think to check the Dowel Pin HOLES of the Flywheel! So, do you think a Flywheel with 0.015" clearance 'tween the Dowel Pins and their Holes would make a difference? Yep. Needless to say, the Customer wasn't happy about this recent turn of events. Neither of course was the Maestro, foe he would have to eat the Machine work on the Flywheel that can't be used now. Fortunately the Customer saw the Beauty of a NEW 200, 356C Flywheel, which will make his engine run joyously long after the pain from the financial pin prick fades away. Yes, the Maestro was another Victim of a "LA-ed" Engine. And a Warning to you should you tackle such a La Brea Beast- CHECK EVERY PART. With a Scanning Electron Microscope and a Nano-positioner. And: Keep the 356 Faith
Maestro
© © 2012 The MAESTRO, Maestro's Library |
Home Videos Books Order Form Engine Overhaul Transmission Overhaul Parts Price List Classifieds Stories Samples Quizzes Ask the Maestro |